
Views: 0 Author: Site Editor Publish Time: 2026-09-09 Origin: Site


Planning a radiant heating project requires absolute precision. You cannot simply guess your technical requirements by glancing at a basic floor plan. Selecting the correct underfloor heating manifold size is actually a strict hydraulic calculation. If you undersize the unit, you risk forcing excessive loop lengths. This inevitably causes severe pressure drops and leaves uncomfortable cold spots across your floors. Conversely, oversizing wastes your budget. It also creates spatial challenges when trying to hide bulky installation cabinets inside your home.
This guide provides a clear, evidence-based framework. We will show you exactly how to calculate your exact port requirements. You will learn to evaluate technical specifications like a professional. Finally, we will help you avoid common installation pitfalls associated with manifold placement, system integration, and future maintenance.
The Golden Rule: One manifold port equals one pipe loop, not necessarily one room. Large rooms often require multiple loops (and therefore multiple ports).
Loop Length Limits: For standard 16mm pipe, a single loop should never exceed 100 meters to prevent system strain and pressure drop.
Future-Proofing: It is safer to buy a manifold with one extra port and cap it off than to realize you are short a port during installation.
System Compatibility: The correct manifold size must align with your heat source (heat pump vs. boiler) and pump capacity.
Table of Contents
Industry terminology often confuses first-time installers. We must define our core components before sizing your system. Understanding the difference between a port, a loop, and a zone prevents costly design errors.
Port: This represents the physical connection point on the manifold body. Every dedicated circuit requires one supply port and one return port. Manufacturers sell manifolds based on this port pairing. A "four-port manifold" serves four distinct circuits.
Loop: This represents the continuous run of pipe. It starts at the supply port, winds across your subfloor, and returns to the corresponding return port.
Zone: This defines an area controlled by a single room thermostat. People often confuse zones with loops. One zone can consist of multiple loops and ports. A large open-plan kitchen might act as a single temperature zone but require three separate pipe loops.
You calculate your manifold size based on the total number of loops your project requires. Do not base it merely on the total square meterage of the property. A 100-square-meter home might need six loops if heavily insulated. A poorly insulated home of the same size might need nine loops.
Every time you exceed the physical length limit of a single pipe run, you must start a new loop. This introduces a new port requirement. Consequently, figuring out your ideal underfloor heating manifold capacity relies entirely on accurate pipe measurements.
Precision sizing demands a methodical approach. Follow these four steps to translate your floor plan into an exact port count.
Measure the exact footprint where you will lay the pipe. Exclude permanent fixtures. Do not run heating pipes under kitchen islands, built-in wardrobes, or heavy bathtubs. Heating enclosed spaces wastes energy. It can also warp cabinetry. Subtract these "dead zones" from your gross room area to find your net heatable area.
Pipe spacing dictates how many meters of pipe you need per square meter of floor. Installers call this the "centers" measurement.
Standard spacing usually sits at 200mm. This setup requires less pipe and works well for well-insulated properties using traditional boilers.
High-heat loss areas often use 150mm spacing. Systems driven by low-temperature air source heat pumps also require this tighter spacing. Tighter spacing directly increases your total pipe length, which heavily impacts your loop count.
Pipe Spacing and Coverage Chart
Pipe Spacing (Centers) | Typical Application | Pipe Required per Square Meter |
|---|---|---|
100mm | Conservatories, high heat loss areas | 10.0 linear meters |
150mm | Heat pumps, standard modern builds | 6.7 linear meters |
200mm | Well-insulated rooms, boiler systems | 5.0 linear meters |
250mm | Passivhaus standards, low heat demand | 4.0 linear meters |
Water loses heat and pressure as it travels through the pipe. If a loop runs too long, the end of the circuit will remain cold. The circulation pump will also struggle against immense friction.
Industry rules dictate strict length limits:
For standard 16mm pipe, the absolute maximum loop length is 100 meters. Most engineers aim for 80 to 90 meters to ensure safety margins.
For thinner 12mm pipe (often used in low-profile retrofit systems), the maximum loop length drops to 80 meters.
Use this basic calculation formula to find your required ports per room:
Total pipe required for a room ÷ Max loop length = Number of ports needed.
Always round up to the nearest whole number. For example, if a large living room requires 140 meters of 16mm pipe, you divide 140 by 100. The result is 1.4. You must round this up. Therefore, this single room requires two separate loops, demanding two manifold ports.
Repeat the calculation for every room on the floor. Add up the required ports. If the living room needs two ports, the kitchen needs two, and the hallway needs one, you need a minimum of five ports.
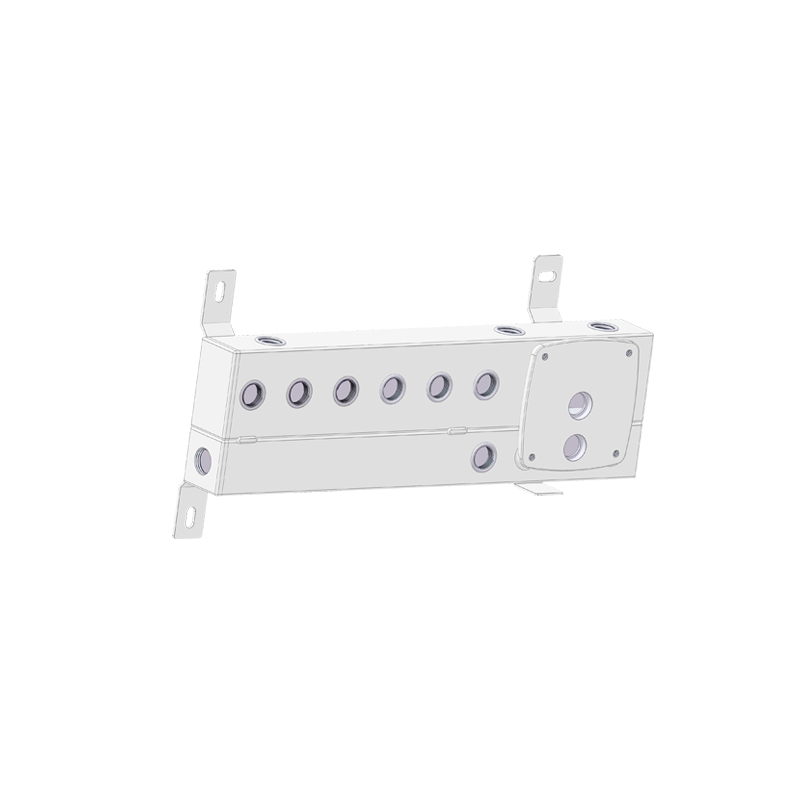
Once you know your required port count, you must evaluate the hardware quality. Not all manifolds deliver the same performance. You should analyze four critical hardware dimensions.
Manufacturers typically forge manifolds from either brass or stainless steel. Both materials work well, but the industry standard has heavily shifted toward stainless steel.
Manifold Material Comparison

You cannot properly balance a floor heating system without flow meters. These small visual gauges sit on the supply rail. They tell you exactly how many liters of water flow through each loop per minute.
Accurate hydraulic balancing ensures short loops do not steal all the hot water from longer loops. Always verify the unit includes high-quality, readable flow meters. Cheap meters cloud up quickly, rendering them unreadable after just one winter.
If you want smart room-by-room temperature control, you must install electro-thermic actuators. These motorized valve heads sit on the return rail. They open and close individual loops based on thermostat commands.
Ensure the return rail valves feature a standard M30 x 1.5 thread. This universal threading allows you to integrate third-party smart zoning systems later without changing the entire manifold.
Assess your heat source. Traditional gas or oil boilers output water at around 70°C. This temperature will permanently damage floor screeds and warp engineered wood. You must attach a mixing valve (blending valve) to the manifold. This valve mixes hot boiler water with cooler return water to achieve a safe 40°C-45°C floor temperature.
Conversely, if you use a low-temperature air source heat pump, you might not need a mixing valve. Heat pumps can supply 40°C water directly. Evaluate your primary heat source before purchasing pump packs.
Even perfectly sized systems fail if installed incorrectly. Navigating placement logistics and system integration requires foresight.
A compact 2-port manifold fits inside narrow utility cupboards. A massive 12-port unit demands a large, dedicated distribution cabinet. You must plan this placement carefully.
Always try to locate the unit centrally within the property. Central placement minimizes transit pipe runs. Transit pipes are the lengths of pipe traveling from the manifold down hallways just to reach their target rooms. Excessive transit pipes can overheat your hallways and waste valuable loop length allowance.
Many homes run radiators upstairs and underfloor heating downstairs. Running both on the same primary circuit creates specific temperature management challenges. Radiators demand high temperatures; floors demand low temperatures.
You must separate these circuits hydraulically. Install independent two-port zone valves before the manifold mixing unit. This prevents the high-temperature radiator water from bleeding into the floor circuits when the floor heating pump shuts off.
Replacing an aging system presents unique challenges.
Port Spacing Dimensions: Older units might feature 40mm spacing between ports, while modern units use 50mm. You must measure the existing pipe spacing. Mismatched spacing requires tedious re-piping and custom fittings.
Water Quality Issues: Investigate why the old unit failed. Sludge buildup or severe corrosion indicates poor water quality. You must chemically flush the entire system and dose it with fresh corrosion inhibitor before installing the replacement unit. Failing to flush the system will destroy the new hardware within months.
You are now ready to make a purchasing decision. Follow these three final rules to secure the right hardware.
Always add one spare port to your final calculation. If your math dictates you need seven ports, buy an eight-port model. Spare ports provide massive safety margins. You might discover an obstacle during installation requiring you to split a loop into two. A spare port saves the project. You can easily blank off any unused ports using inexpensive brass caps.
The circulation pump must handle the total water volume and pressure resistance of your combined loops. A standard Grundfos UPS3 or Wilo Para pump easily handles up to eight ports. However, if you run a 12-port system with loops maxing out at 100 meters, a standard pump will struggle. You may need an upgraded, high-head pump to ensure adequate flow rates across all circuits.
Heating hardware operates under constant pressure and thermal stress. Look for strict regulatory compliance. Verify the unit carries CE or UKCA marking. Check for factory pressure testing certifications. Reputable manufacturers always offer a minimum 10-year warranty on the main stainless steel or brass body. Avoid unbranded imports lacking pressure certifications; a cracked barrel will cause catastrophic water damage.
Sizing your hardware correctly is a strict mathematical process. It relies entirely on net square meterage, specified pipe spacing, and rigid loop length limits. You cannot guess your way to a balanced heating system. By understanding the relationship between ports and loops, you protect your home from severe hydraulic imbalances.
Next Steps:
Map out your exact floor plan and subtract any permanent fixture footprints.
Calculate your total pipe length based on your chosen spacing centers.
Divide that total length by the 100-meter rule (for 16mm pipe) to find your loop count.
Aggregate your port requirements across all rooms and add one spare port for safety.
If integrating with a heat pump or a complex multi-zone smart system, consult a hydraulic design schematic before executing your purchase.
A: Yes, using blanking caps is a standard, safe practice and offers future flexibility. You can easily cap off unused ports during installation. If you build an extension later, you simply remove the cap and connect the new loops. This approach costs very little upfront but saves massive headaches later.
A: Typically, the limit is 12 ports. Going beyond this usually requires splitting the system into two manifolds to maintain adequate pump pressure and flow. A standard residential circulation pump struggles to push water evenly through 13 or more loops. Splitting the load ensures optimal hydraulic balance.
A: It is highly recommended to ensure hydraulic balance, reduce transit pipe heat loss, and simplify air purging. Running pipes between floors traps air in vertical lines. Dedicated hardware on each floor makes the entire system vastly easier to install, bleed, and control over its lifespan.


