Views: 0 Author: Site Editor Publish Time: 2026-02-11 Origin: Site


You might wonder, how far can an expansion tank be from the water heater? Most experts recommend placing the tank adjacent to the heater, at least 18 inches from the cold water inlet. This distance keeps your system safe and efficient. Proper support prevents stress on pipes and fittings. You can use a reliable product like the Easywell Expansion Tank Bracket to secure the tank. Following these guidelines protects your home and keeps your water heater running smoothly.
Install the expansion tank within 18 inches of the water heater for optimal performance.
Always check local plumbing codes and manufacturer guidelines before installation.
Use a sturdy support bracket to secure the expansion tank and prevent damage to pipes.
Regularly inspect the expansion tank for leaks and ensure proper air pressure.
Place the tank on the cold water line to effectively absorb pressure changes.
Consider hiring a licensed plumber to ensure compliance with safety standards.
Adjust the tank's pre-charge pressure to match your home's water pressure for best results.
Follow maintenance tips to extend the life of your water heater and prevent costly repairs.
You may ask how far can an expansion tank be from the water heater. Most plumbing professionals recommend placing the water heater expansion tank as close as possible to the cold water inlet. The ideal distance is usually within 18 inches of the water heater. This setup allows the tank to absorb pressure changes quickly and efficiently. When you keep the tank nearby, you reduce the risk of stress on pipes and fittings. You also make maintenance easier because everything stays in one location.
If you wonder how far can an expansion tank be from the water heater in a typical home, you should know that shorter distances work best. The closer you install the water heater expansion tank, the better it can protect your system from pressure spikes. You should always consider the manufacturer's instructions and local codes when planning your installation. These guidelines help you avoid common mistakes and ensure your system works safely.
Building codes and manufacturer guidelines play a big role in deciding how far can an expansion tank be from the water heater. Most codes require you to install the water heater expansion tank on the cold water line, near the heater. Some manufacturers specify a maximum distance, often around 18 inches, to guarantee proper operation. You should always check the manual for your specific water heater expansion tank before starting the installation.
Local plumbing codes may have extra rules. Some areas require a licensed plumber to install the tank. Others may ask for an inspection after installation. You should contact your local building department to learn about these requirements. Following the code keeps your home safe and helps you pass inspections. It also protects your warranty on the water heater expansion tank.
You have some flexibility when deciding how far can an expansion tank be from the water heater. Certain factors allow you to adjust the placement without hurting system performance. Consider these tips:
Place the water heater expansion tank near the inlet of the circulator pump. This setup minimizes pressure drops and improves system performance.
Mount the tank vertically with the connection at the top. This position reduces stress on the tank and prevents air from getting trapped inside.
Check the air side pressure in the tank. Make sure it matches the static pressure of your system for the best results.
Plan for isolation. Install a ball valve so you can isolate the tank for maintenance without draining the whole system.
You may need to adjust the location if you have limited space or special plumbing layouts. The main goal is to keep the water heater expansion tank close enough to respond quickly to pressure changes. You should also think about choosing the right size expansion tank for your system. A properly sized tank works better and lasts longer. If you have questions about choosing the right size expansion tank, consult a professional or use an online sizing calculator.
Tip: Always use a sturdy support bracket, like the Easywell Expansion Tank Bracket, to secure your tank. Proper support prevents movement and protects your plumbing.
By following these guidelines, you can answer the question of how far can an expansion tank be from the water heater with confidence. You will keep your system safe, efficient, and up to code.
You want your water heater expansion tank to work as intended. Proper distance plays a big role in safety and performance. When you install the tank too far from the water heater, you risk delayed response to pressure buildup. This delay can cause stress on pipes and fittings. If you keep the tank close, it absorbs sudden pressure changes quickly. You protect your plumbing system from leaks and bursts.
A water heater expansion tank helps prevent dangerous pressure buildup. Without the right distance, the tank cannot do its job. You might notice banging pipes or dripping relief valves. These signs point to a system under stress. You can avoid these problems by following the recommended guidelines. The benefits of installing an expansion tank include longer equipment life and fewer emergency repairs.
Tip: Always check the air pressure in your water heater expansion tank before installation. This step ensures the tank can handle pressure buildup effectively.
Building codes exist to keep you and your property safe. Most codes require you to install the water heater expansion tank within a certain distance of the heater. Inspectors look for proper placement during professional installation. If you ignore these rules, you risk failing inspection or voiding your warranty.
You should always read the manufacturer’s instructions. Many brands specify the maximum distance allowed. Local codes may also require a licensed plumber for professional installation. Following these rules ensures your water heater expansion tank works as designed. You also avoid costly fines or repairs.
Code Requirement | Why It Matters |
|---|---|
Proper tank placement | Prevents pressure buildup |
Licensed installation | Ensures professional results |
Inspection compliance | Protects your investment |
Many homeowners make mistakes when installing a water heater expansion tank. Placing the tank too far from the heater is a common error. This mistake reduces the tank’s ability to control pressure buildup. Some people skip professional installation, thinking it saves money. In reality, improper setup can lead to leaks, water damage, or even system failure.
Another mistake involves poor support. If you let the tank hang from the pipe, you risk damaging your plumbing. Always use a sturdy bracket for support. You should also avoid ignoring regular maintenance. Check your water heater expansion tank for signs of wear or incorrect pressure.
The benefits of installing an expansion tank go beyond code compliance. You gain peace of mind, better system performance, and protection from unexpected repairs. Trusting professional installation helps you avoid these common pitfalls and keeps your system running smoothly.
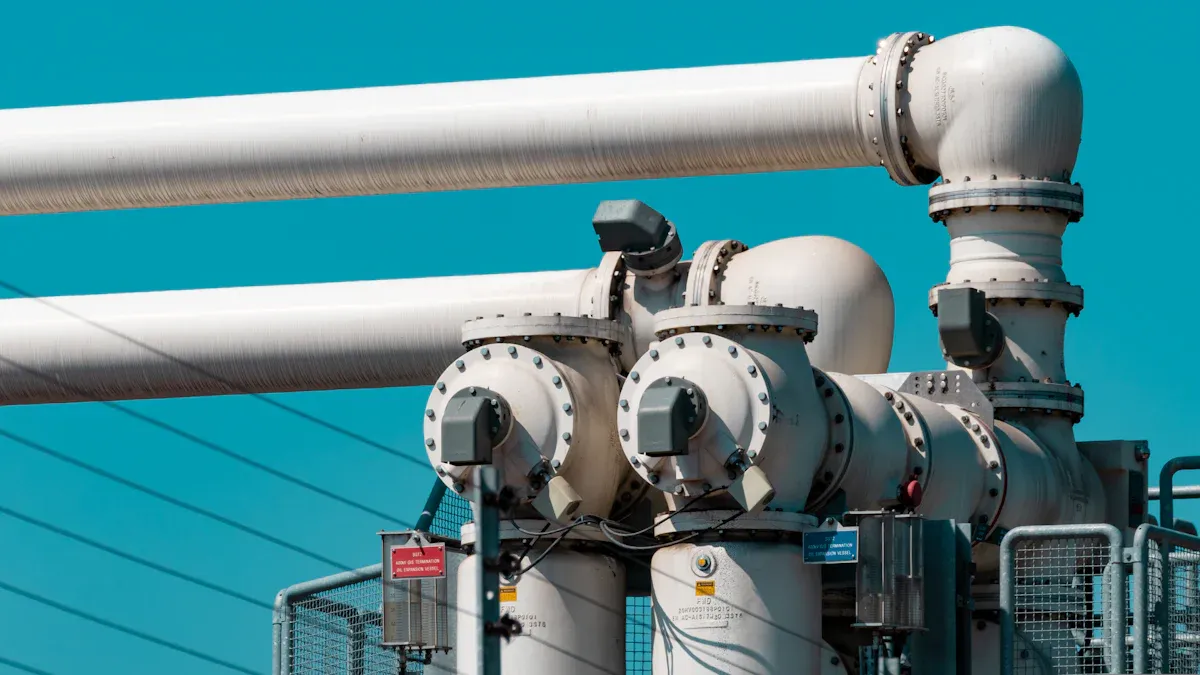
You should always install your water heater expansion tank on the cold water line. This location allows the tank to absorb pressure changes before they reach the heater. Place the tank between the water heater shutoff valve and the cold water inlet. This setup ensures the tank can protect your system from pressure spikes.
Follow these best practices for expansion tank installation on the cold side:
Install the tank upright for best performance.
Keep the tank at least 18 inches away from the vent connector.
Avoid placing the tank on the hot side.
Position the tank about 18 inches from the water heater inlet.
You should also pressurize the tank to 5–10 psi above your house water pressure before installation. Apply thread sealant to the connection for a secure fit. Hand-tighten the tank onto the pipe fitting, then restore water and power to the system. Monitor for leaks over the next 24 to 48 hours.
Distance matters for every water heater expansion tank installation. The ideal spot is within 18 inches of the cold water inlet. This range allows the tank to react quickly to pressure changes. If you install the tank too far away, it may not protect your system as well.
You must also avoid placing the tank too close to the vent connector. Keep at least 18 inches of space to prevent heat damage. Always check your local codes and the manufacturer’s instructions for specific distance requirements. These rules help you pass inspection and keep your warranty valid.
Proper support is critical for every water heater expansion tank installation. You should never let the tank hang from the piping alone. Use a sturdy bracket or strap to secure the tank. This step prevents movement that can damage pipes and fittings. It also extends the life of your tank.
The Easywell Expansion Tank Bracket Series offers reliable support for any environment. You can choose from three models:
Bracket Type | Key Features | Ideal Use Cases |
|---|---|---|
Bowed Expansion Tank Bracket | Moisture-proof, corrosion-resistant | Wet or corrosive environments |
Round Expansion Tank Bracket | Quick installation, fits most residential systems | Homes and light-commercial buildings |
Square Expansion Tank Bracket | Compact, modular, reinforced corners | Tight spaces, heat-pump systems |
All Models | Strong, corrosion-resistant, versatile installation | HVAC and plumbing worldwide |
Each model provides structural strength and vibration control. You can mount these brackets on walls or ceilings, depending on your space. When you use a quality bracket, you prevent unnecessary movement and protect your investment.
Tip: Always use a bracket or strap for support. Never rely on the piping alone for your water heater expansion tank.
By following these guidelines, you ensure a safe and effective expansion tank installation. You protect your plumbing, extend the life of your equipment, and meet code requirements.
Learning how to install a water heater expansion tank helps you protect your plumbing system and meet code requirements. You can complete this installation with basic tools and a careful approach. Follow these steps to ensure a safe and effective result.
Before you start, gather all the tools and materials you need for the installation. Having everything ready makes the process smoother and safer. Here is a list of what you should have:
Adjustable wrench
Pipe cutter or hacksaw
Screwdriver
Teflon tape
Safety goggles
Water heater expansion tank kit (includes the tank, tee fitting, and connection hoses)
Tip: Always wear safety goggles when you work with pipes or tools. Protecting your eyes is important during any installation.
You can follow these steps to learn how to install an expansion tank correctly. Each step ensures your water heater expansion tank works as intended and meets safety standards.
Turn off the water supply and power to your water heater. This step keeps you safe and prevents water from leaking during the installation.
Drain the water heater if necessary. Use a hose to direct water to a safe location. This makes it easier to work on the pipes.
Identify the best location for the installation. Choose a spot on the cold water line, close to the water heater. Make sure you have enough space to mount the tank securely.
Adjust the air pressure in the expansion tank. Use a tire gauge to check the pressure. Set it to match your home’s water pressure for best results.
Use a sturdy bracket, such as the Easywell Expansion Tank Bracket, to support the tank. Secure the bracket to the wall or ceiling. This step prevents stress on the pipes and keeps the tank stable.
Cut the cold water pipe using a pipe cutter or hacksaw. Attach the tee fitting from your kit. Wrap Teflon tape around the threads to prevent leaks. Connect the expansion tank to the tee fitting. Tighten all connections with an adjustable wrench.
Restore the water supply and power to your water heater. Check all connections for leaks. Tighten any fittings if you see water dripping. Watch the system for a few minutes to make sure everything works as expected.
Note: After you install an expansion tank, check the system again after 24 hours. Look for leaks or changes in water pressure.
Now you know how to install a water heater expansion tank. This installation protects your plumbing and helps your system last longer. If you follow each step, you can install an expansion tank with confidence and meet code requirements.
You can spot signs of improper expansion tank installation if you know what to look for. One common issue is a tank that hangs from the pipe without proper support. If you see the tank drooping or notice that it is only attached by its connection point, this setup can cause problems. Over time, the weight of the tank puts stress on the pipe fitting. This stress increases the risk of leaks and water damage. You may also hear unusual noises, such as banging or clunking, when water flows through the system. These sounds often mean the tank cannot absorb pressure changes quickly enough. If you see water dripping from the connection or notice the relief valve leaking, you should check the installation right away.
Tip: Always use a sturdy bracket or strap to support your expansion tank. This step prevents movement and protects your plumbing.
You can correct distance or support problems with a few simple steps. Start by turning off the water supply at the shutoff valve. Open a nearby faucet to release any pressure in the system. If needed, drain some water from the heater to avoid spills when you disconnect the tank.
Next, inspect the tank and its connections. Look for leaks around the fittings and check the pressure relief valve. Use a tire gauge to measure the air pressure in the tank. The reading should match your home’s water pressure. If you hear banging or clunking, the tank may be too far from the heater or not supported well.
Here are some troubleshooting steps you can follow:
Check for leaks at the tank and fittings.
Inspect the pressure relief valve for proper operation.
Measure the tank’s air pressure and adjust if needed.
Listen for abnormal noises during water use.
Look for signs of internal leaks, such as a drop in system pressure.
If you find that the tank is not supported, install a quality bracket like the Easywell Expansion Tank Bracket. Choose the right model for your environment and mount it securely to the wall or ceiling. This upgrade will reduce stress on the pipes and extend the life of your system.
You should inspect your expansion tank at least once a year. Regular checks help you catch small problems before they become big repairs. Use this checklist to keep your system in top shape:
Inspection Task | What to Look For |
|---|---|
Visual Check | Signs of sagging or loose support |
Leak Inspection | Water around fittings or tank |
Pressure Test | Air pressure matches system needs |
Relief Valve Test | No leaks or drips |
Noise Check | Quiet operation, no banging |
If you notice any issues, address them right away. Tighten loose fittings, adjust the air pressure, or replace worn parts as needed. Always use proper support for the tank. A well-maintained expansion tank protects your plumbing and keeps your water heater running efficiently.
Note: Routine maintenance saves you money and prevents unexpected breakdowns. Make inspection part of your home care routine.
You may notice that plumbing codes can differ from one city or county to another. Local rules often set specific requirements for expansion tank placement and distance. Some areas require you to install the expansion tank at least 18 inches from the cold water inlet of the water heater. This rule helps ensure the tank responds quickly to pressure changes and keeps your system safe.
Not every manufacturer sets a strict distance requirement. For example, brands like Amtrol and Watts may not specify an exact measurement. This means you must check your local code before starting your project. You should always install the expansion tank on the cold water side, between the water heater and any backflow prevention device. This placement allows the tank to absorb excess pressure before it reaches the heater.
Here are some common local code variations you might encounter:
Some codes require a minimum distance, such as 18 inches, from the cold water inlet.
Certain areas may not specify a distance but still require placement on the cold water side.
You may need to install the tank between the water heater and a backflow device.
Local codes can override manufacturer guidelines, so always check with your building department.
Tip: Always review your local plumbing code before installing an expansion tank. This step helps you avoid costly mistakes and ensures your installation passes inspection.
You must understand the permit and inspection process before you install an expansion tank. Many municipalities require you to get a permit for any work involving water heaters, including the addition or replacement of an expansion tank. This rule applies whether you install a new system or upgrade an existing one.
When you apply for a permit, you signal to the local authorities that you plan to make changes to your plumbing. The permit process helps ensure your installation meets safety standards. After you complete the work, an inspector will visit your home to check the installation. The inspector looks for proper placement, secure support, and compliance with local codes.
Here is what you can expect in most areas:
You may need a permit before you install, remove, or replace a water heater or expansion tank.
The permit process often triggers a required inspection by a licensed official.
The inspector checks for code compliance, correct distance, and proper support.
Passing inspection protects your investment and keeps your home safe.
Note: Failing to get a permit or skipping the inspection can lead to fines, denied insurance claims, or problems when you sell your home. Always follow your local rules for a smooth and safe installation.
By understanding local code variations and the permit process, you make sure your expansion tank installation meets all requirements. You protect your home, avoid legal issues, and ensure your system works as intended.
You should always install your expansion tank at the recommended distance, use proper support, and follow all code and manufacturer guidelines. The table below highlights the most important points:
Key Point | Description |
|---|---|
Necessity of Expansion Tanks | Prevents pressure buildup and protects your plumbing system. |
Local Code Compliance | Ensures your installation meets safety standards and passes inspection. |
Professional Installation | Guarantees correct setup and long-term performance. |
Benefits of Expansion Tanks | Extends water heater life and prevents costly damage. |
Using a quality support product like the Easywell Expansion Tank Bracket helps prevent leaks, reduces wear, and improves safety. Always adjust the tank’s pre-charge pressure, mount it vertically, and schedule regular inspections. By following these steps, you keep your system safe, efficient, and up to code.
You should check your local plumbing code. If your home has a closed plumbing system or a backflow preventer, you likely need an expansion tank. You may also notice frequent relief valve leaks or pressure issues.
You can install an expansion tank if you have basic plumbing skills and tools. Always follow manufacturer instructions. If you feel unsure, you should contact professional services for expansion tank installation to ensure safety and code compliance.
You should place the expansion tank on the cold water line, close to the water heater. Keep it upright and secure it with a sturdy bracket. This position helps the tank absorb pressure changes quickly.
You should inspect your expansion tank at least once a year. Look for leaks, check the air pressure, and make sure the support bracket stays secure. Regular checks help prevent unexpected problems.
You need to match the expansion tank size to your water heater capacity and system pressure. Most manufacturers provide sizing charts. If you feel unsure, ask a plumber for help.
If you install the tank too far from the heater, it may not absorb pressure changes quickly. This can lead to stress on pipes, leaks, or relief valve problems. Always follow recommended distance guidelines.
Many cities require a permit for expansion tank installation. You should check with your local building department before starting the project. Permits help ensure your installation meets safety codes.
You should use a bracket designed for expansion tanks, like the Easywell Expansion Tank Bracket. These brackets provide proper support, reduce vibration, and prevent damage to pipes and fittings.


