
Views: 0 Author: Site Editor Publish Time: 2026-09-09 Origin: Site


Think of the underfloor heating manifold as the central nervous system of your entire home heating setup. It commands the flow of warm water. It directs optimal comfort to every distinct zone seamlessly. Unfortunately, a mismatched or underspecified unit often leads to severe consequences. You might face uneven floor temperatures. You could suffer premature pump burnout. You may even encounter highly complex retrofitting projects down the line.
Selecting the right components requires a strategic approach. You must balance system flow rates. You must evaluate material durability. You must verify existing system compatibility. This remains true whether you are tackling a brand-new build or modernizing an older property. Getting this core component wrong can cripple your system efficiency.
This comprehensive guide breaks down the critical technical criteria you need. We explore precise sizing metrics. We examine material evaluations and smart control integration. You will learn exactly how to specify the perfect setup. You will avoid the most common installation bottlenecks from day one.
Always match the number of manifold ports to your exact loop count, keeping individual pipe runs under 100 meters to prevent pressure drops.
Choose between stainless steel and brass based on your local water hardness and budget; both are durable, but stainless steel offers superior corrosion resistance.
Pre-assembled manifold sets (including 'A-rated' pumps and blending valves) reduce compatibility risks and installation time compared to bare manifolds.
Ensure your chosen manifold features universal threading or verified compatibility if integrating 230v actuators or connecting to existing radiator circuits.
Table of Contents
System sizing requires precise mathematical planning. You cannot simply guess your port requirements. An incorrectly sized unit will starve certain rooms of heat. It will overwork your circulation pump.
Industry standards dictate a strict correlation between ports and pipe lengths. One manifold port serves exactly one loop of pipe. You must never exceed 100 meters for a single loop using standard 16mm tubing. This specific length limit maintains optimal water flow. It prevents severe pressure drops across the circuit.
Water loses momentum as it travels. Pipe walls create physical friction. When a loop stretches beyond 100 meters, the circulation pump struggles. It cannot push water back to the return bar efficiently. The water cools down too much before completing its journey. This results in cold spots across your floor.
You must map your room square footage accurately. This determines your specific loop requirements. A standard baseline helps simplify this process. A typical 20-square-meter room usually requires two independent loops. Therefore, this room demands two dedicated manifold ports.
Follow these steps to calculate your exact sizing needs:
Measure the precise floor area of every heated room.
Subtract areas occupied by permanent fixtures like kitchen islands.
Divide the remaining square meterage by your planned pipe spacing coverage. A 100m roll of pipe spaced at 200mm centers covers roughly 20 square meters.
Assign one port for every calculated 100m loop.
Add up the total number of loops across all rooms to find your manifold size.
Many homeowners debate buying an exact match versus sizing up. Purchasing a manifold with one extra port provides excellent flexibility. You simply leave the extra port blanked off initially. This allows for potential future extensions, like adding a small conservatory or bathroom circuit later.
However, avoid buying a massively oversized unit. An excessively large 12-port system running only four loops can present balancing challenges. It increases the risk of over-pressurizing an oversized unit. Proper flow meter adjustment becomes critical here. Stick to one or two spare ports maximum.
Material selection determines your system longevity. Plumbers constantly debate the merits of different metal composites. The choice largely depends on your local water conditions. It also depends on your specific heating goals.
Brass represents the traditional industry standard. Installers have trusted this heavy-duty material for decades. It features remarkably high thermal mass. It offers excellent structural rigidity during installation. Threads cut into brass rarely strip.
However, brass carries historical vulnerabilities. Aggressive or extremely hard water can degrade brass over several decades. This process is known as dezincification. Zinc leaches out of the alloy. The metal becomes porous and brittle. You must treat a brass-based system properly. You must maintain strict chemical inhibitor levels to guarantee historical reliability.
Stainless steel now stands as the modern market standard. Plumbers praise its exceptionally lighter weight. It offers significantly higher corrosion resistance. This characteristic proves crucial for mixed-metal systems. It prevents galvanic corrosion when steel radiators operate on the same main circuit.
Furthermore, stainless steel manufacturing utilizes thinner outer walls. This creates larger internal cross-sections compared to brass equivalents. Wider internal channels allow for better overall flow rates. The pump experiences less internal resistance pushing water through the main bars.
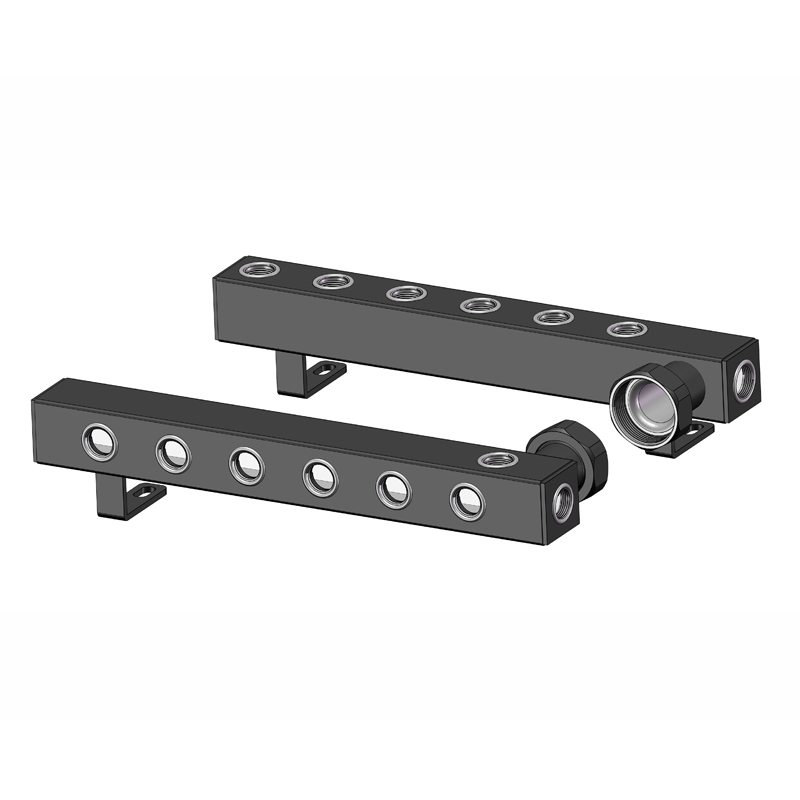
We must provide a balanced assessment of these materials. Stainless steel often carries a slight market premium. The manufacturing process demands more complex welding. Yet, this upfront investment pays off. The heavily reduced risk of microscopic pinhole leaks provides peace of mind. It makes stainless steel highly cost-effective for long-term residential applications.
Material Properties Comparison
Feature | Brass Manifold | Stainless Steel Manifold |
|---|---|---|
Corrosion Resistance | Moderate (Requires inhibitors) | Exceptional |
Weight & Handling | Heavy, rigid | Lightweight, easy wall-mounting |
Internal Flow Capacity | Standard | High (Thinner walls = larger bore) |
Best Use Case | Traditional installations | Mixed-metal, modern heat pumps |
Purchasing components requires careful consideration. You can buy parts individually or as a complete package. Your decision directly impacts installation time. It also influences long-term system reliability.
A bare manifold includes only the essential flow and return bars. It features basic brackets and isolation valves. This stripped-down approach appeals to a very specific buyer. It is mostly for commercial installers replacing a specific cracked unit. They already possess the surrounding pumps and mixing blocks.
You face significant risks buying components piecemeal. Mismatched threading causes immediate leaks. Incompatible flow meters fail to read system pressure accurately. Assembling random parts often voids manufacturer warranties. It turns a simple project into a frustrating puzzle.
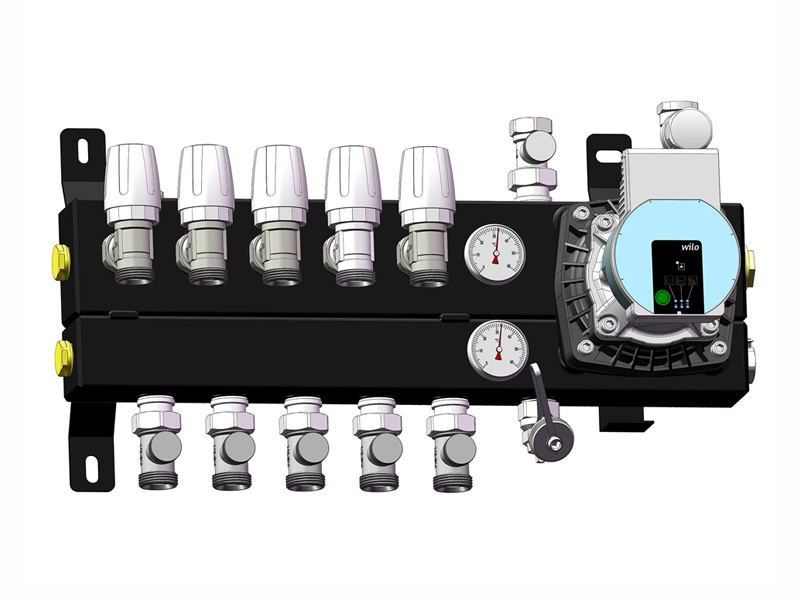
We strongly advocate for purchasing a complete set. These bundles provide massive installation value. A premium set includes an A-rated circulation pump. It features a matched thermostatic blending valve. Manufacturers pressure-test these complete units before shipping.
This approach drastically reduces compatibility risks. Your plumber simply mounts the unit to the wall. They connect the primary heat source. They attach the floor loops. This cuts hours off labor bills.
You must evaluate these bundles carefully before purchasing. Do not accept generic, unbranded components.
Verify pump quality: Look for industry-leading equivalents like Grundfos or Wilo. These brands guarantee energy efficiency. They provide excellent aftermarket replacement parts.
Check the blending valve: It must accurately step down high-temperature boiler water. Traditional boilers output water at 70°C or higher. The valve must flawlessly reduce this to safe underfloor temperatures between 35°C and 45°C.
Examine bracket integrity: Ensure the mounting brackets feature rubber anti-vibration mountings. This stops pump hum from transferring into your walls.
Modern heating demands sophisticated control. You rarely want every room heated simultaneously. Intelligent zoning saves energy. It requires specific hardware mounted directly on your manifold.
True multi-zone control requires individual thermal actuators. These sit on the individual return valves. When a room thermostat calls for heat, it sends a signal. The actuator slowly opens the specific valve for that room. This allows warm water to flow into that single loop.
You must check your manifold thread sizes. The European industry standard is M30 x 1.5. Buying a unit with this universal thread ensures broad compatibility. It allows you to use standard 230v or 24v actuators from almost any smart home brand. Avoid proprietary threads. They lock you into expensive, single-brand ecosystems.
Built-in, adjustable flow meters sit on the flow bar. They are absolutely non-negotiable for system balancing. These small glass or plastic vials contain a red indicator. The indicator moves down as water pushes past it.
They allow users to visually verify flow rates. You can precisely throttle the Gallons Per Minute (GPM) or Liters Per Minute (LPM) per zone. A small bathroom loop needs less flow than a large living room loop. Twisting the flow meter manually adjusts this balance. It ensures uniform heat across the entire house.
Linking the underfloor heating manifold to a smart thermostat wiring center represents a common scenario. The wiring center acts as the brain. It sits physically next to the manifold bars. It receives wireless signals from your wall thermostats. It then distributes electrical power to the correct actuator.
Emphasize the need for standard connections. Your wiring center should feature standard volt-free relays. This allows seamless communication with any heat source. It prevents you from becoming trapped in a closed, manufacturer-locked ecosystem.
Installation day reveals the true quality of your hardware. Long-term maintenance relies entirely on the auxiliary valves attached to your unit. Do not overlook these critical end-cap components.
Every system requires initial filling and eventual flushing. This necessitates robust fill and drain points at the end of the manifold bars. You must connect a heavy hose to these points.
Cheap plastic drain cocks represent a major failure point. They frequently snap during aggressive system flushing. Always specify solid brass or heavy-duty nickel-plated drain valves. They withstand the mechanical stress of wrench tightening. They endure the high pressure of mains water flushing.
Trapped air destroys system efficiency. Air bubbles create physical blockages inside the 16mm pipes. They prevent water circulation. They cause the circulation pump to cavitate and overheat.
Your unit requires manual or automatic air vents (AAVs). These must sit on both the flow and return bars. Automatic vents are vastly superior. They contain a small internal float. When air enters the chamber, the float drops. This opens a tiny valve to release the air automatically. It prevents stubborn airlocks from forming.
Many renovations combine technologies. You might install underfloor heating downstairs. You might retain standard radiators upstairs. Address the technical realities of running a radiator off a manifold system carefully.
We face significant temperature discrepancies here. Radiators need high heat, typically around 65°C to 75°C. Underfloor loops need low heat to prevent cracking your floor screed. The necessity of correct blending valve placement becomes critical. You must pipe the radiator circuits directly from the boiler. They must split off before the blending valve drops the temperature for the floor loops. This primary and secondary circuit design protects your floors while keeping radiators hot.
Choosing the correct equipment defines the success of your heating project. You can eliminate installation headaches by following a structured buying logic. Your decisions today impact your home comfort for decades.
Summarize your final shortlisting logic into three actionable steps. First, count your required loops based on strict 100-meter pipe limits. Second, select your core material based on local water quality and budget constraints. Third, choose a pre-assembled kit complete with an A-rated pump and blending valve. This guarantees ease of installation.
Take concrete next steps before clicking purchase. Verify your primary heat source type. A heat pump operates at different temperatures than a gas boiler. You must ensure the manifold’s blending valve is appropriately rated for your specific heat source. Finally, consult the exact product specifications. Verify the physical dimensions to ensure the assembled unit actually fits inside your planned wall cabinet.
A: A standard unit typically ranges from 2 to 12 ports. Systems requiring more than 12 individual loops should use multiple manifolds. You must strategically place these separate units around the property. This division prevents severe pressure drops and ensures your circulation pump can maintain adequate flow to all zones.
A: Yes, but you must respect strict temperature requirements. Radiators require much hotter water than floor loops. To integrate them, the radiator feed must be piped before the manifold's thermostatic blending valve. This ensures the radiator gets high heat while the valve safely drops the temperature for the delicate floor loops.
A: First, isolate the flow and return bars from the main boiler. Attach a durable hose to the drain valves on both bars. Use your mains water pressure to flush the individual loops. You must flush them one single loop at a time. This targeted pressure clears stubborn air and construction debris efficiently.
A: Standard boilers output water at 60-80°C. If this scorching water enters your floor pipes directly, it will crack your concrete screed and destroy your flooring. The blending valve mixes this hot boiler water with cooler returning water. This precise mixing achieves a safe, comfortable floor temperature of 35-45°C.


